
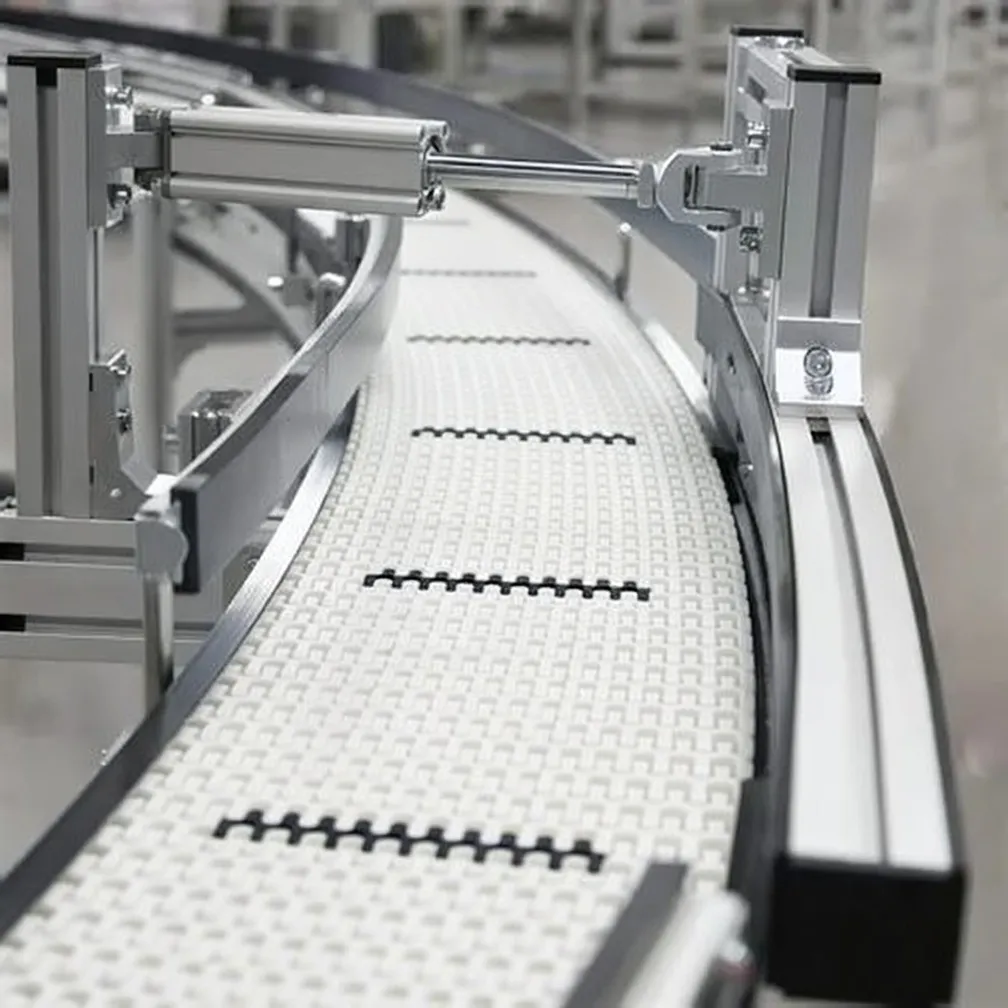
 Walk into almost any production facility in the West Midlands or along the M62 corridor and you will find plastic modular belt conveyors doing the heavy lifting — literally and figuratively. These interlocking thermoplastic systems have replaced traditional flat-belt and chain conveyors across food processing, automotive parts handling, pharmaceutical packaging and a wide range of general manufacturing operations because they combine genuine mechanical ruggedness with the kind of hygiene and dimensional precision that UK regulatory frameworks increasingly demand. When a single module cracks, chips or jams under load, the entire line can stop. Knowing exactly how to replace that module — without unnecessary downtime, without specialist contractors, and without risking the rest of the belt assembly — is one of the most valuable skills a UK plant maintenance team can hold. This guide walks through the process methodically, from initial fault identification right through to post-replacement tension verification, drawing on real engineering practice rather than generic handbook theory.
Understanding Plastic Modular Belt Construction Before You Begin
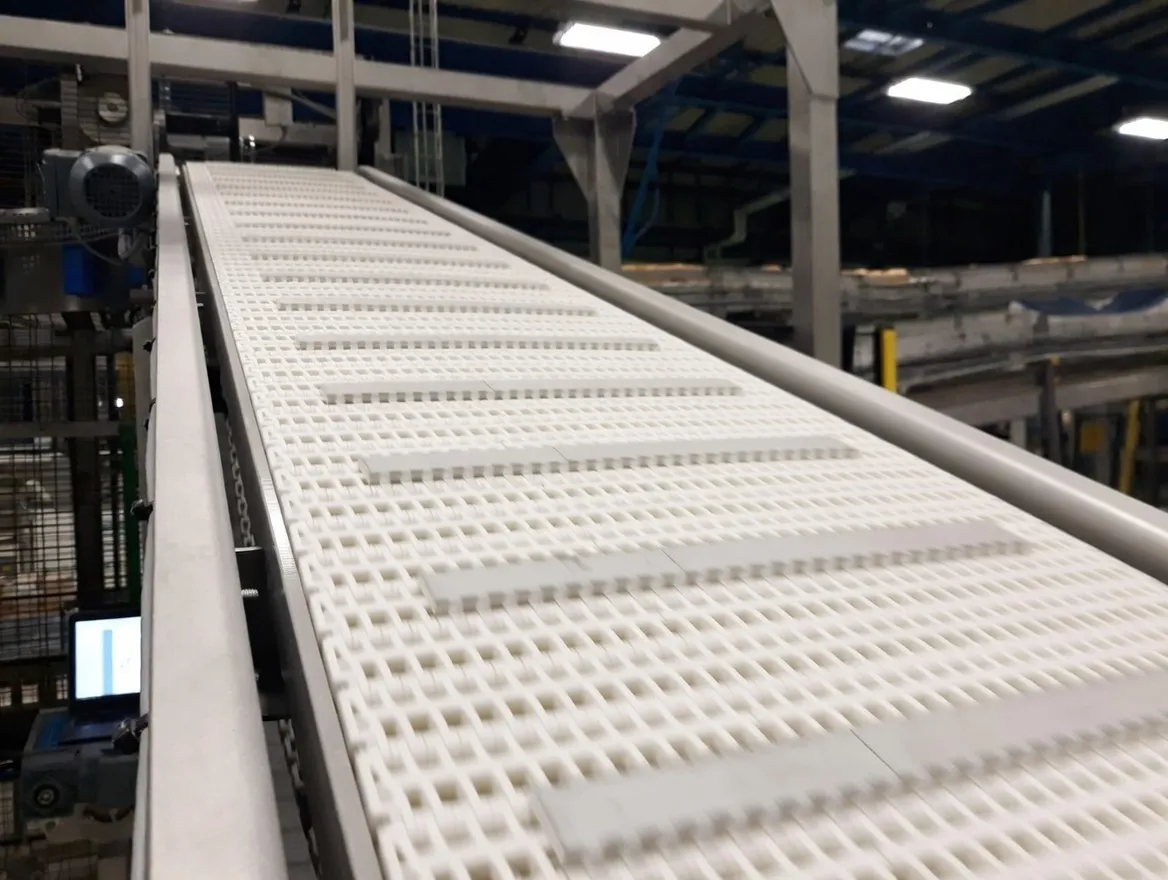
A plastic modular belt is not a single length of material — it is an assembly of individual injection-moulded modules, locked together laterally by stainless steel or engineered polymer rods that pass through aligned hinge eyes. This architecture is precisely why module-level replacement is possible without dismantling the entire conveyor. Each module slots into the row on either side of it and the connecting rods hold the structure under dynamic load. Understanding this before you pick up a tool is critical. Removing a rod in the wrong sequence, or forcing a module out of a tightly tensioned run, can cause adjacent rows to bow or cascade — creating a far larger maintenance job than the original fault. Most belt widths running through UK factories range from 200 mm to 1,200 mm, and the pitch — the distance between the centrelines of successive hinge eyes — is commonly 12.7 mm, 15.875 mm or 25.4 mm, though specialised configurations for certain food-processing lines in Sheffield and Birmingham can carry tighter pitches. Taking note of your exact belt type and pitch before ordering replacement modules saves the frustration of receiving incompatible parts, particularly when procurement lead times are being squeezed.
Tools and Materials Your UK Maintenance Team Will Need
Rod Removal Tools
A purpose-built rod-withdrawal tool — essentially a flat, notched piece of hardened steel that engages the rod end without damaging the hinge-eye geometry — is the single most important item. Many experienced technicians in UK plants fabricate their own from strip stock ground to the manufacturer’s rod diameter tolerance. Improvising with screwdrivers or picks risks peening the rod end, making future withdrawals exponentially harder. Pair this with a magnetic wand for collecting dropped rods inside the conveyor frame, which is a surprisingly common frustration on open-frame belt systems.
Replacement Modules
Always hold a stock of replacement modules on-site, matching your belt’s exact pitch, material grade, and colour coding. For facilities running food-grade lines — common in the Yorkshire and Lancashire food manufacturing clusters — modules must comply with EC 1935/2004 and meet FDA standards where applicable. Never substitute a polypropylene module into a polyethylene belt row, even if the physical dimensions appear close; the differential thermal expansion coefficients can generate dangerous tensile stress around the hinge eyes, particularly during CIP (clean-in-place) hot-wash cycles that are standard in UK dairy and beverage operations.
Measuring and Inspection Equipment
A digital vernier calliper (capable of 0.01 mm resolution) for checking rod diameter wear, a straight edge or taut string for verifying belt tracking alignment post-replacement, and a torque-indicating tensioner gauge if your conveyor uses spring-loaded tail-pulley tensioning. A digital camera or phone with macro capability is invaluable for photographing the damaged area before disassembly — this evidence supports warranty claims with Ever Power if the damage appears manufacturing-related, and creates a visual record for your maintenance log, which UK HSE compliance often requires.
Step-by-Step Module Replacement Procedure
The sequence below reflects best practice for plastic modular belt replacement across general manufacturing environments. Adapt to your specific conveyor geometry and LOTO (Lock-Out/Tag-Out) requirements under UK PUWER 1998 legislation before beginning any work.
Isolate and Lock Out the Conveyor
Engage your full LOTO procedure. In the UK, this is mandated under the Provision and Use of Work Equipment Regulations 1998 (PUWER). Isolate the motor drive, apply a personal padlock and tag, and bleed any pneumatic tensioning circuits. If the belt runs above a pit or incline section — a common arrangement in automotive assembly facilities in the West Midlands — chock the tail-end pulley to prevent unexpected belt movement under gravity. Allow any hot-wash or steam cycle to complete and the belt surface to cool to ambient temperature before touching modules. Attempting work on a belt that has just come out of a 85°C CIP cycle invites thermal burn injuries and can also make polypropylene modules temporarily more brittle at surface contact points. Make sure your maintenance log entry is dated and signed before any tools approach the machine — UK insurance and HSE auditors look for this paper trail.
Identify and Inspect the Damaged Module
With the belt stationary and isolated, walk the run from drive end to tail end. A cracked or failed module is usually visible as a bright white stress fracture across the web body, or as a missing segment where the plastic has broken away entirely. In some cases — particularly in cold-storage distribution centres — crazing appears across the module surface without visible cracking, indicating material fatigue from repeated freeze-thaw cycling. Note the row number from a reference mark (most experienced engineers chalk or cable-tie-mark the drive-end row as Row 1), and count across the belt width to identify the lateral position of the failed module. Photograph thoroughly. Check the adjacent modules in the same row for sympathetic cracking — it is common for a single impact event to fracture two or three modules simultaneously, and missing one during inspection means returning to site within a short operational window.
Release Belt Tension
Before any rod can be withdrawn, belt tension must be reduced to near-zero at the replacement zone. On spring-loaded tail-pulley systems, back off the tensioner adjuster bolts symmetrically — a quarter turn on each side, alternating, until you can press a finger into the belt slack. On pneumatic tensioners, release the control air downstream of the isolator. On fixed-frame conveyors without adjustable tensioning — still found in older Sheffield and Manchester manufacturing units — you will need to work with whatever natural slack exists at the return run under the frame. In these cases, create a slack window directly at the damaged area by gently pushing a clean wooden wedge between the belt return and the underside of the carry-run frame, just upstream of the repair zone. This gives you the clearance needed to withdraw the rod without fighting the belt tension. Record your starting tension measurement before release; you will need it to restore to specification during reassembly.
Withdraw the Connecting Rods
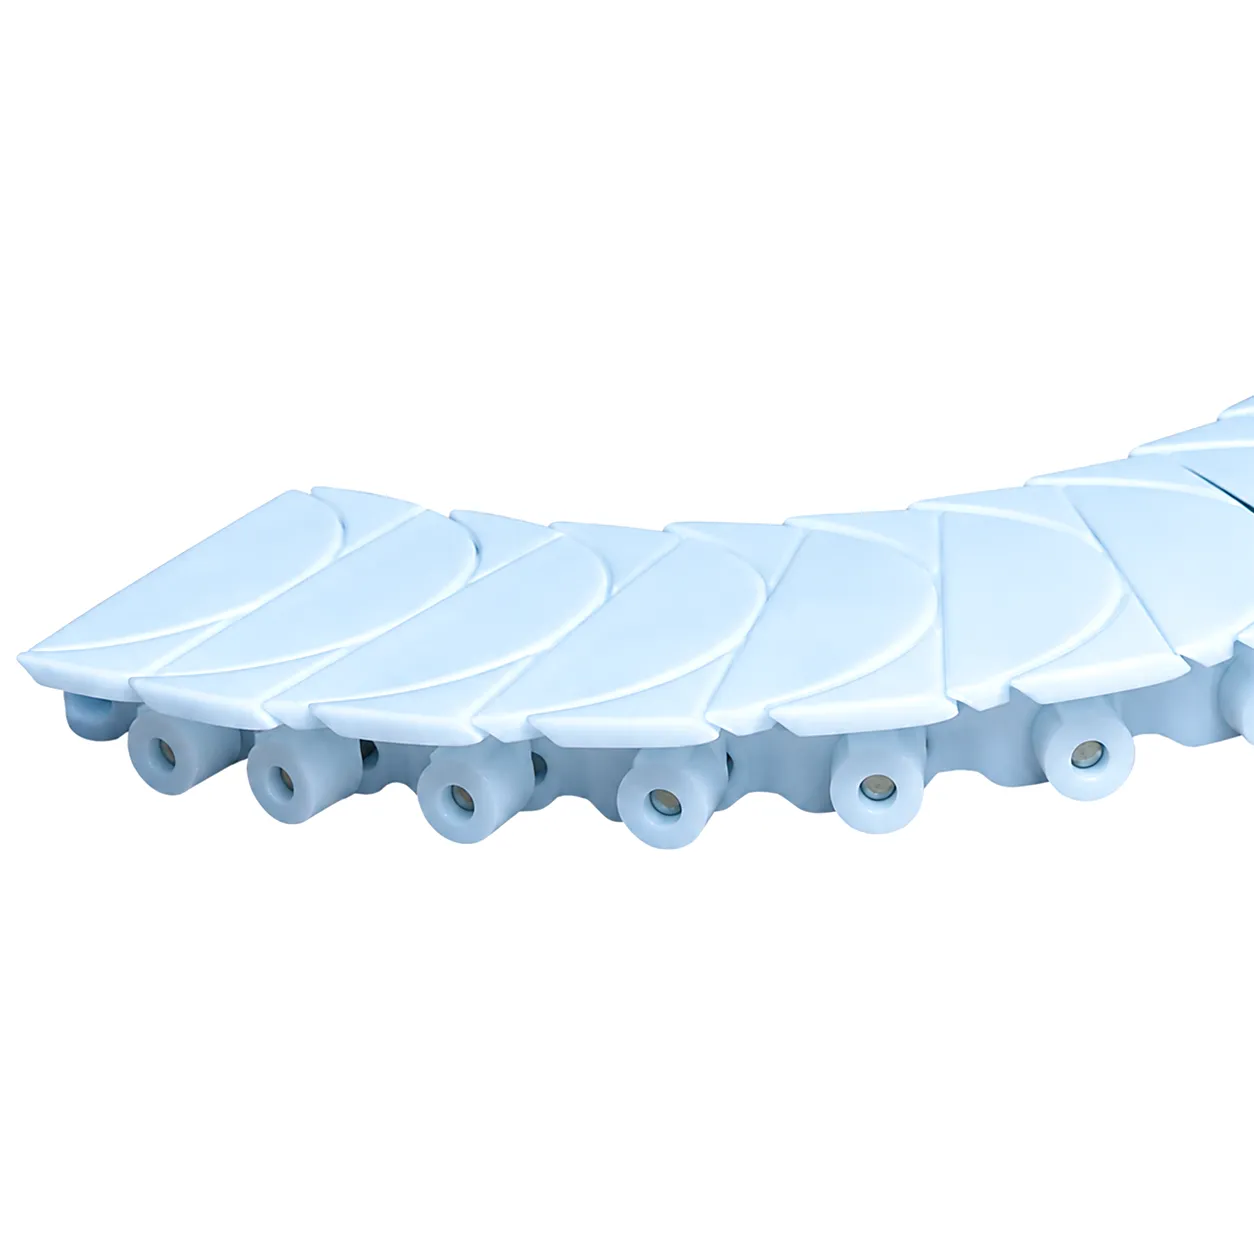
The damaged module is held in the assembly by the rod passing through its hinge eyes — one on each side of the module, linking it to the rows fore and aft. Use your rod-withdrawal tool to engage the rod end cap or the exposed rod tip at the belt edge. Apply steady lateral pressure — never a sharp blow — and draw the rod out from the edge of the belt into clear space. Keep hold of it immediately; a dropped 500 mm rod into an open conveyor frame in a busy production area is a struck-by hazard, particularly for personnel working at floor level on the underside of the conveyor. If the rod resists withdrawal and your tension has been properly released, check whether the rod end cap has corroded into the guide-bar channel. Light application of a food-safe penetrating lubricant — acceptable for most UK food-plant environments — followed by a two-minute dwell, almost always resolves this. Repeat for both rods (the one forward of the module and the one aft of it) before attempting to lift the module clear.
Remove the Damaged Module and Clean the Zone
With both rods withdrawn, lift the damaged module clear. Inspect the hinge-eye channels of the adjacent modules for secondary cracking, abrasion scoring, or food debris compaction — any of these conditions will compromise the fit of the new module. Use a stiff nylon brush and an appropriate solvent (check compatibility with your module material: isopropyl alcohol is generally safe for polypropylene and acetal-grade modules common across UK food lines) to clean the hinge-eye apertures. Run a 4 mm gauge pin or twist drill shank through each hinge-eye channel to confirm the internal diameter is free from deformation. Inspect the conveyor frame wearstrip in the damaged zone — a section of the UHMWPE or stainless-steel wearstrip that runs along the carry-rail in that area may have been scored by the failed module and could accelerate wear on the new replacement if not addressed.
Insert the Replacement Module
Orient the new plastic modular belt module correctly before seating it. Most belt designs are directional — the hinge-eye geometry has a leading-edge side and a trailing-edge side, and reversing the module will cause misalignment of the rod channels across the full belt width. If in doubt, reference the orientation marking moulded into the module body (usually an arrow or the manufacturer’s part number raised text facing in a specific direction). Slide the module into the gap between the fore and aft rows, engaging the interdigitated hinge fingers carefully by hand. No force should be required at this stage. If the module does not seat smoothly, do not use a mallet — re-examine the hinge-eye alignment and check whether a fragment of the broken module remains lodged in the channel from the adjacent row. A small piece of debris in one hinge eye, overlooked during cleaning, is the most common cause of difficult module insertion in UK field service calls.
Re-insert Connecting Rods and Secure End Caps
Thread the first rod through the hinge-eye channel by hand, starting at one edge of the belt and progressing steadily across the width. Apply no angular force — the rod should pass through all eyes in a continuous smooth motion. If it catches, withdraw, check eye alignment, and retry. Once the rod reaches the far edge, snap the end cap into the guide-bar retaining groove. Repeat this process for the second rod on the other side of the replaced module. Check both rod end caps sit flush with the belt edge — protruding caps will snag side guards, drive sprocket flanges and adjacent lane guides, causing immediate secondary failure. In wider belts, particularly those above 800 mm running in Birmingham automotive component lines, a two-person rod insertion approach is standard to keep the rod straight throughout its travel and prevent it bowing and binding against intermediate hinge eyes.
Restore Belt Tension and Verify Tracking
With both rods secured, re-tension the belt to the manufacturer’s specification recorded before the repair. On spring-loaded systems this usually means returning the tail-pulley adjuster bolts to their previous position by the same counted number of turns. On pneumatic systems, reintroduce control air to set pressure. Before any electrical power is restored, rotate the belt manually through at least one full circuit — on a short conveyor this is achievable by hand at the drive pulley; on longer runs, use the slow-inch function if your drive controller has one. Watch the replacement zone pass over the nose bar, through the drive sprockets, around the return run, and back onto the carry-run surface. Any lateral creep — the belt drifting consistently to one side — indicates the replacement module may be sitting fractionally proud on one edge due to an unsupported hinge eye. Correct this before powered operation resumes. Document the tension values, the rotation test result, and the technician’s name in your maintenance management system.
Ever Power Plastic Modular Belt Products for UK Maintenance Teams
Heavy Duty Grid Straight Run Conveyor Belt
Engineered for demanding carry loads across UK automotive and metal fabrication environments, this grid-pattern plastic modular belt offers exceptional open-area ventilation while maintaining structural integrity under heavy product loads. The straight-run geometry, combined with precision-moulded hinge eyes, means individual module replacement — exactly as described in this guide — is completed in minutes rather than hours, even on wide-belt configurations running in Sheffield and Birmingham fabrication plants. Available in polypropylene and glass-filled nylon grades with food-contact compliance on request.
Flat Top Straight Run Belt with Side Guards
The integrated side-guard design eliminates the need for separate lane-guide rail systems, reducing conveyor frame complexity and maintenance touchpoints significantly. The smooth flat-top surface is particularly suited to pharmaceutical blister-pack handling and FMCG packaging lines — sectors with a strong UK presence in the East Midlands and Greater London distribution clusters — where product tipping or edge marking is unacceptable. Modules are individually replaceable, and the side-guard sections themselves can be serviced independently of the main belt run, minimising downtime per maintenance event.
Plastic Modular Belt Technical and Performance Reference Table
The table below summarises the key parameters maintenance teams in the UK should verify before sourcing replacement modules. Mismatching any of these values — even by one pitch increment — will prevent correct seating of the new module and may compromise belt tracking under load.
| Παράμετρος | Τυπικό εύρος | Notes for UK Maintenance |
|---|---|---|
| Belt Pitch | 12.7 mm / 15.875 mm / 25.4 mm | Match exactly — rods will not pass if pitch differs by even 0.5 mm |
| Module Material | PP, PE, Acetal (POM), PA6, PVDF | Do not mix; differential thermal expansion causes hinge-eye stress fracture |
| Module Width (per piece) | 50 mm – 200 mm per module | Belt width is assembled total; confirm belt and module widths independently |
| Max Operating Temperature | PP: 90°C / Acetal: 100°C / PVDF: 140°C | Critical for UK food-processing CIP cycle compatibility |
| Max Permissible Belt Pull | 800 N/m – 6,500 N/m (belt-width basis) | Never exceed after module replacement until tracking check is complete |
| Connecting Rod Diameter | 3 mm – 6 mm (material: SS 316 or PP) | Replace rod if vernier shows wear below 0.2 mm of nominal; SS 316 preferred for washdown environments |
| Ανοιχτή περιοχή (%) | 0% (solid) – 47% (grid) | Affects drainage speed in washdown and drainage applications |
| Minimum Drive Sprocket Teeth | 7 – 12 teeth (pitch-dependent) | Always verify post-replacement that sprocket engagement is symmetrical and without skip-tooth tendency |
| Regulatory Compliance | EC 1935/2004, FDA 21 CFR, RoHS | Request material declaration certificate from supplier for each module batch |
Understanding Why Modules Fail: Root-Cause Analysis for UK Engineers
Impact and Foreign Object Damage
The single most common cause of module fracture across UK manufacturing lines is foreign object ingestion — a bolt, a casting flash fragment, or a misplaced tool introduced upstream of the belt. The plastic modular belt, unlike a steel slat chain, distributes impact energy across the immediate module rather than across a longer chain segment. This is generally a virtue for limiting secondary damage, but it does concentrate the fracture at a predictable geometric location: across the web between the two widest central hinge groups. Prevention requires physical guarding at belt loading zones and regular inspection protocols — ideally scheduled every shift changeover. UK automotive facilities in the West Midlands that run disciplined 5S programmes consistently report 60–70% fewer module failures per year than equivalent facilities without those housekeeping protocols.
Chemical and Thermal Degradation
Polypropylene modules are relatively resistant to mild acids and alkalis, but prolonged exposure to chlorinated cleaning agents — particularly hypochlorite solutions above 200 ppm used in UK poultry processing sites — causes surface embrittlement within 12–18 months. The modules appear intact under visual inspection but fail catastrophically under the next significant belt-pull spike. Switching to peracetic acid (PAA)-based sanitisers, or sourcing PVDF-grade modules rated for continuous chlorine exposure, eliminates this degradation mode entirely. Thermal cycling is an equally significant driver in cold-chain logistics operations: a plastic modular belt transitioning between a −18°C blast-freeze store and a 15°C ambient packing hall experiences differential thermal contraction stress across every hinge joint on every cycle. Schedule more frequent visual inspections — every two to three weeks — on belts exposed to these thermal shock cycles.
Belt Tension and Tracking Mismanagement
Over-tensioning is a surprisingly common maintenance error, particularly in facilities where engineering staff turn over frequently or where the original commissioning documentation has been lost — a situation that affects more UK SME manufacturers than is generally acknowledged. A plastic modular belt operating at 20% above its designed belt pull will progressively elongate hinge-eye apertures on every row, reducing the interference fit that holds the rod in position and initiating a slow-onset tracking creep. By the time this tracking drift becomes visible to the naked eye, multiple rows will already show hinge-eye distortion. Re-tensioning to correct creep without addressing root cause simply restarts the cycle. The solution is to restore the belt to its specified tension using calibrated equipment, then identify and fix the drive-side cause — usually a worn sprocket tooth, an incorrectly adjusted tail-drum, or a wearstrip section that has been mis-sized during a previous repair.
Specialist Applications: When Standard Module Replacement Requires Modified Technique
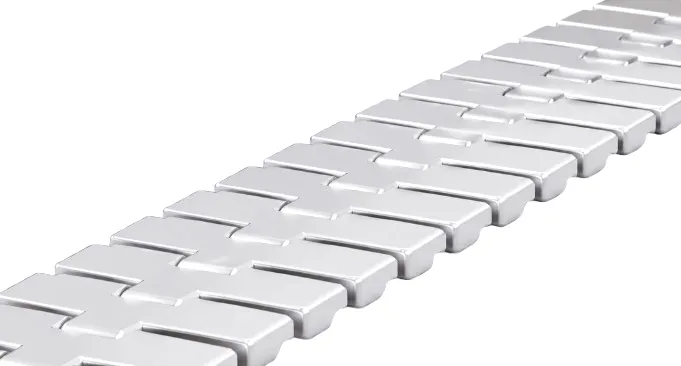
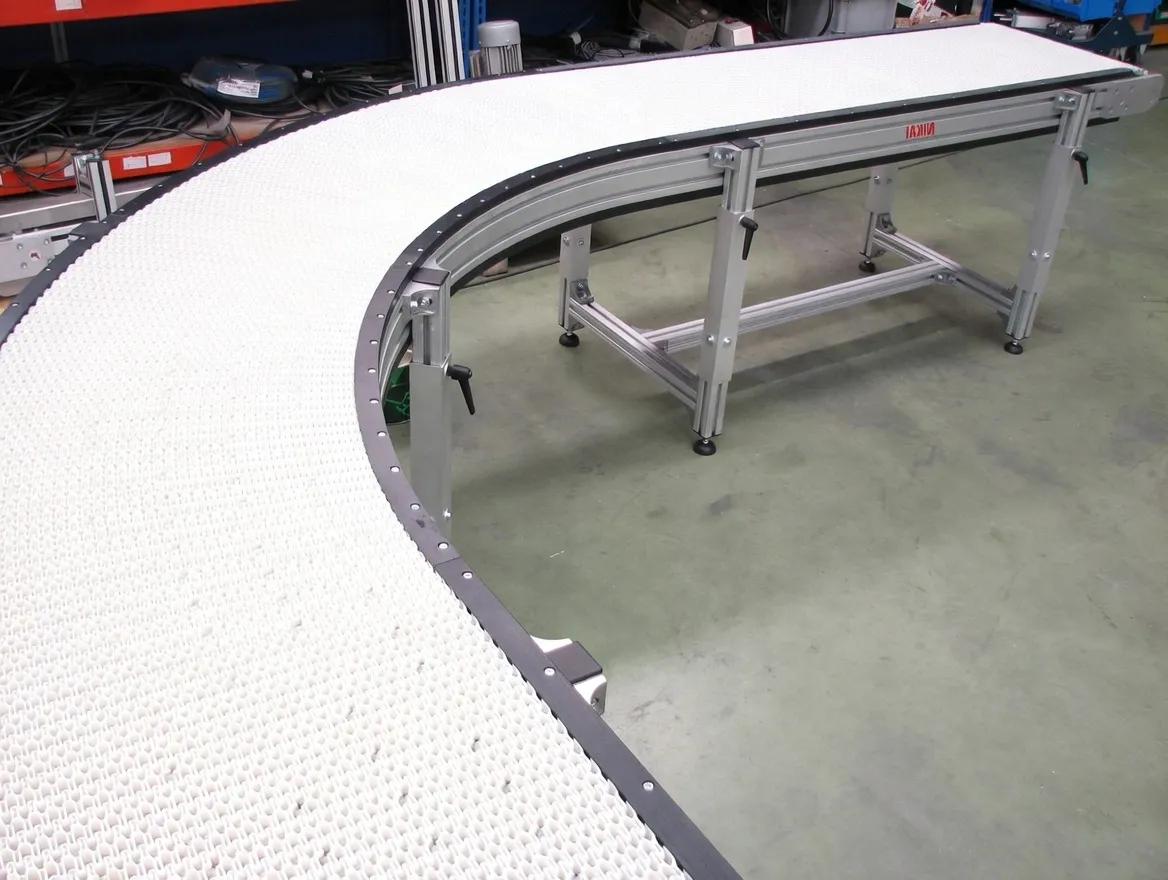
Certain plastic modular belt configurations place demands on the replacement technician that go beyond the standard straight-run procedure outlined above. Gapless seamless designs — increasingly specified in pharmaceutical tablet handling and confectionery coating applications across UK manufacturing — use a tight intermesh geometry that requires a specific rod-extraction sequence to avoid distorting the adjacent rows. Unlike standard open-mesh belts where the rod can be walked out under slight lateral flex, a gapless belt must be precisely aligned in a dead-straight run with zero transverse bow before rod withdrawal is attempted. Even a 2 mm bow across the belt width at the repair zone will bind the rod against the closed hinge eyes and cause damage to the replacement module during insertion. For these belt types, Ever Power’s technical team strongly recommends the use of a purpose-built alignment jig — available as part of the custom tooling package offered to UK industrial customers — to hold the belt dead-straight across the full width during the rod manipulation sequence.
Tab side-flexing configurations, widely used in curved conveyor sections for bottling lines in Scottish whisky distilleries and English soft-drink bottling plants, present a different challenge. The tab projections on the module edge engage with curved guide rails to allow the belt to navigate a horizontal radius, and these tabs are subject to localised wear that differs substantially from the web-fracture pattern seen on straight-run belts. When replacing a module in a side-flexing run, the replacement module must be pre-checked against a radius template matching the conveyor’s design radius — typically expressed as R800 mm, R1,000 mm or R1,500 mm — before insertion. A module moulded to a straight-run geometry seated into a radius curve section will introduce a local stiff point that generates rhythmic impact loads on the drive sprocket at every belt cycle, leading to accelerated sprocket tooth wear and potentially generating vibration signatures detectable by the facility’s condition monitoring system.
Customer Success Story: Sheffield Precision Components Manufacturer
Background: Stamped Metal Components, South Yorkshire
A mid-sized precision stamping operation based on the outskirts of Sheffield — producing pressed metal components for the UK automotive supply chain — ran a series of straight-run plastic modular belt conveyors to transport stamped parts from press lines to a centrally located deburring and quality inspection station. The facility operated two twelve-hour shifts, six days a week, placing significant cumulative hours on the belt systems. Periodically, metal burrs and small stamping slugs escaped the press-side extraction systems and made their way onto the belt carry-surface, causing module web fractures at a rate the maintenance team described as unacceptable — an average of three to four module failures per week across four conveyor lines, each requiring the line to stop for 25–40 minutes while an external conveyor service contractor attended site.
The facility’s engineering manager contacted Ever Power to review the situation. Ever Power’s technical team visited the Sheffield site, assessed the debris type, module geometry, and frequency of failure, and recommended a transition from standard polypropylene modules to a glass-filled nylon (PA6-GF) grade with a reinforced web cross-section — a custom specification not available from the facility’s previous supplier. The switch also incorporated a redesigned end-cap geometry that simplified rod withdrawal, enabling the in-house maintenance team to complete a module replacement in under eight minutes without requiring specialist tools. Ever Power supplied a comprehensive on-site training session for the six-person maintenance team and provided an initial buffer stock of 200 replacement modules held at the facility, replenished on a call-off basis as stock was drawn down.
Over the following six months, module failure frequency across all four lines dropped from an average of 3.5 per week to 0.4 per week — a reduction of over 88%. Maintenance contractor call-out costs reduced by approximately £18,000 over that period. The maintenance team now completes all module replacement work internally, and the improved end-cap design has eliminated the rod-withdrawal frustrations that previously required penetrating lubricant on almost every repair job. The facility has since extended the Ever Power supply relationship to cover a fifth conveyor line handling heat-treated components, specifying a high-temperature acetal module grade for that application.
What UK Maintenance Engineers Say About Ever Power
“The PA6-GF modules Ever Power specified for our press-line conveyors have been running for nearly eight months now and we’ve had four failures in that time, down from what used to be a daily problem. The improved end-cap design is genuinely a better piece of engineering — rod withdrawal takes less than a minute and we no longer need the penetrating spray that used to be a constant on our parts shelf.”
— Maintenance Engineering Supervisor, Precision Stamping Facility, Sheffield
“We run food-grade lines that go through CIP at 85°C three times daily. Our previous belt supplier’s modules started crazing within nine months. The acetal modules Ever Power supplied have now completed fourteen months of continuous washdown service without a single stress fracture. The material declaration certificates they provide with each batch mean our BRC audit sign-off goes through without a question.”
— Plant Engineer, Poultry Processing Facility, North Yorkshire
“When we needed replacement modules for a 2007-vintage Italian conveyor for which the original manufacturer no longer carries parts, I was fully prepared to scrap and replace three conveyor frames. Ever Power’s team reverse-engineered the module geometry from the samples we sent, matched the pitch exactly, and had production samples to us within three weeks. We’ve since placed standing orders for all four of the older conveyor lines the original OEM can no longer support.”
— Capital Equipment Manager, Automotive Assembly Subcontractor, Birmingham
Post-Replacement Verification and Preventive Maintenance Schedule for UK Plants
A successful module replacement is not fully complete until the belt has run through a supervised commissioning cycle and the verification checklist has been signed off. At the end of the first powered run following repair — typically a 10-to-15-minute run at reduced speed before returning to full production throughput — the maintenance technician should confirm that the replaced module row is tracking centrally, that neither connecting rod end-cap is protruding beyond the belt edge, that sprocket tooth engagement through the replaced zone sounds and feels identical to the adjacent rows, and that no vibration signature has developed at the replacement row frequency (calculable as belt speed in m/s divided by row pitch in metres). Any anomaly detected in this post-run check is a signal to stop and investigate before full-load production is resumed.
Beyond the immediate post-replacement verification, UK maintenance managers should establish a written preventive inspection schedule tailored to the specific operating conditions of each conveyor. For heavy-duty applications in metal fabrication or waste processing, a visual inspection of every module on every row — practical only during a scheduled downtime window — is appropriate every four to six weeks. For cleaner environments such as pharmaceutical or electronics production, quarterly inspection of the belt as a whole, with attention focused on the drive and tail sprocket engagement zones where hinge-eye wear is most concentrated, is generally sufficient. Ever Power can provide application-specific maintenance interval recommendations as part of the after-sales support package offered to UK customers — a service that requires nothing more than a conversation with the technical team. Contact Ever Power at [email protected] to discuss your specific conveyor configuration and receive guidance tailored to your production environment, shift pattern, and product type.
Questions UK Maintenance Teams Ask About Plastic Modular Belt Replacement
How long does it typically take for an in-house UK maintenance team to replace a single module on a plastic modular belt without specialist tools?
With proper LOTO, a release of belt tension, and a purpose-built rod-withdrawal tool on hand, an experienced two-person team typically completes a single-module replacement in 15–25 minutes from the point of isolation to restoring drive power. First-time technicians, unfamiliar with the specific belt design, should allow 45–60 minutes. Ever Power’s custom end-cap designs, engineered specifically for easier field service, have been shown to reduce replacement time by 30–40% compared to standard catalogue end-caps used by many other suppliers.
Where can I find a reliable UK supplier that can provide plastic modular belt replacement modules for older conveyor systems where the original manufacturer no longer stocks parts?
Ever Power offers a reverse-engineering and custom manufacture service specifically for legacy belt systems from discontinued product lines. Send physical sample modules or detailed dimensional drawings to the technical team, and Ever Power can produce matched replacements within 12–18 working days for most configurations. This service has helped UK facilities in Birmingham, Manchester, and across the East Midlands retain serviceable legacy conveyor infrastructure rather than incur the capital cost of full frame replacement.
What is the cost of a replacement plastic modular belt module for a standard food-grade conveyor running in a UK poultry processing facility, and how can I get a quote?
Module pricing varies with material grade, pitch, and order quantity. Standard polypropylene modules for common pitches are typically priced competitively against European distribution stock. Food-grade acetal or PVDF modules carry a material cost premium but offer significantly extended service life in washdown environments, improving the total cost of ownership substantially. For an accurate quote covering your specific pitch, width, material, and quantity requirements, contact Ever Power directly at [email protected] with your belt specification details.
Which plastic modular belt module material is best suited for UK cold-storage and blast-freeze conveyor applications that cycle between minus 18 degrees Celsius and ambient temperatures?
Acetal (polyoxymethylene, POM) is the preferred material for freeze-thaw cycling applications due to its lower moisture absorption and better retention of impact strength at sub-zero temperatures compared to polypropylene. For blast-freeze environments below −20°C, Ever Power’s engineering team recommends a specific acetal copolymer grade with a modified plasticiser package that maintains hinge-eye flexibility at the lowest operating temperatures encountered in UK cold-chain logistics operations. Avoid standard polypropylene in these applications — it becomes brittle below −10°C and fractures rather than flexing under the impact loads that occur during product loading.
How do I know when it is more cost-effective to replace the entire plastic modular belt rather than continuing with individual module replacements on my Sheffield manufacturing line?
The commonly used threshold in UK industrial maintenance practice is the 20% rule: when the combined count of replaced modules across the belt assembly exceeds 20% of the total module count, the structural consistency and tracking behaviour of the belt become unreliable enough to justify full replacement. At this point, the time and material cost of continued spot repairs, combined with the increasing risk of tracking-related sprocket damage, typically exceed the cost of a new belt. Ever Power can help you evaluate this threshold for your specific conveyor dimensions and provide a cost comparison between continued module replacement and a full belt supply programme.
Who is responsible for ensuring plastic modular belt replacement procedures comply with UK PUWER regulations, and what records should be kept after each maintenance event?
Under PUWER 1998, the employer bears ultimate responsibility for ensuring that work equipment — including conveyor belt systems — is maintained in a safe condition and that maintenance is carried out by competent persons. Each replacement event should be recorded in the plant’s maintenance management system with the date, the conveyor identifier, the row number and lateral position of the replaced module, the batch or lot number of the replacement module, the name of the technician who performed the work, and the result of the post-replacement verification run. This record forms part of the equipment’s inspection history and may be requested during HSE audits or insurance assessments following any incident involving the conveyor.
Ready to Source Replacement Modules or Discuss a Custom Specification?
Ever Power’s UK technical team is available to review your belt specification, confirm material compatibility, and provide a detailed quote — typically within one business day.
Λάβετε μια προσφορά — [email protected]
επεξεργασία από gzl